A well-installed heat pump can feel almost invisible. Rooms sit at the right temperature, the airflow is gentle, and the electric bill doesn’t sting. When something is off, you know it quickly, especially in shoulder seasons when heat pumps should shine. Heating replacement and heating unit installation are not commodities you shop by price alone. The difference between a job done right and a job rushed shows up for the next 15 years, in comfort, noise, maintenance, and energy use.
This is a practical guide based on what tends to trip people up during a heating system installation, and what you should expect from a contractor who knows the terrain.
Heat pumps in plain terms
A heat pump moves heat from one place to another. In summer, it moves heat out of the house, like an air conditioner. In winter, it pulls heat from the outside air and brings it in. Even when it feels cold outside, there is usable heat out there. Modern cold-climate units can extract heat effectively at 5 degrees Fahrenheit, sometimes lower, though capacity drops as temperatures fall. This is why contractor choices around sizing, balance points, and backup heat matter.
There are two broad families. Ducted systems use existing supply and return ductwork to distribute air through the home. Ductless mini-split systems use small, quiet indoor heads mounted on walls or ceilings, each serving a zone. There are hybrids too, such as ducted mini-splits that serve one or two zones, or multi-head systems tied to a single outdoor unit. Picking among them depends on the home’s layout, existing ducts, and your tolerance for wall-mounted equipment.
As for efficiency, heat pumps are rated by HSPF2 for heating and SEER2 for cooling. The numbers are useful for comparisons within a product class, but they say little if the system is oversized, undercharged, or installed without attention to airflow. Equipment sets the ceiling on performance. Installation quality determines how close you get.
When heating replacement makes sense
I tend to suggest a heat pump when fuel costs are trending high, when ducts already exist and are in decent shape, or when a homeowner wants one system to handle both heating and cooling. If you currently heat with resistance heating unit installation baseboards, a well-sized heat pump can cut winter electricity use by a third, sometimes more. If you heat with oil or propane, a heat pump can reduce operating cost substantially while also giving you central air conditioning. For natural gas users, the calculus is closer. In some regions, gas remains cheap, but the comfort and cooling benefits can still tilt the decision.
Signs that a heating replacement is due include rising repair frequency, inconsistent room temperatures even after maintenance, or ductwork noises and airflow that never seem to settle. Age matters, but not as much as people think. I’ve replaced ten-year-old systems that were sized poorly and limped along, and I’ve tuned twenty-year-old systems that still had life left. Focus on performance and load, not just the calendar.
Sizing is not a guess
A proper heat pump install starts with a load calculation. In North America, that usually means Manual J, a room-by-room assessment of heat loss and gain based on insulation levels, window types, infiltration rates, and design temperatures. Contractors who skip this step tend to oversize. Oversizing causes short cycling, higher noise, and poor humidity control, and it usually erases efficiency advantages. On the flip side, undersizing without a plan for backup heat leads to chilly mornings and unhappy calls when a cold snap hits.
As a rough frame, many single-family homes fall between 1 ton and 4 tons of capacity for the entire house, but the range is wide. A tight 1,600 square-foot home built in the last decade might need only 1.5 to 2 tons. An older, drafty 2,000 square-foot home with single-pane windows could need 3 tons or more. The right path is to measure, not assume. Expect your installer to ask about insulation upgrades, window replacements, and air sealing. If they never set foot in the attic or crawlspace, they are guessing.
Matching the system to the house
Ducted versus ductless is not a lifestyle choice alone, it’s about how the house wants to be heated. If your existing ducts are well laid out, sealed, and sized for low static pressure, a ducted heat pump makes sense. If ducts are a mess, or if you have a two-story home that’s always had uneven temperatures, ductless zones can restore control. Multi-split systems, where one outdoor unit serves several indoor heads, look clean on paper, but they come with trade-offs. Each head has minimum capacity, and the system tends to run at higher compressor speeds to keep all zones happy, which can reduce efficiency. If you’re going ductless, a one-to-one pairing of outdoor to indoor units often performs best, especially in bedrooms where low, steady operation is the goal.
If you’re set on ducted, pay attention to the air handler and duct design. Variable-speed air handlers paired with inverter-driven outdoor units can deliver whisper-quiet airflow and steady comfort. Static pressure, measured in inches of water column, tells you whether the ducts can handle the required airflow. Many legacy systems operate at 0.7 inches or higher. Heat pumps prefer under 0.5, and 0.3 is lovely if you can manage it. Lower pressure means quieter operation, better coil performance, and fewer drafts.
The quiet details that matter
Small decisions add up to big differences.
Refrigerant line length and routing affects capacity. Manufacturers list maximum equivalent lengths and vertical separations, often around 50 to 100 feet and 25 to 50 feet. Exceed those and you invite oil return problems and capacity loss. Keep runs short and well insulated. Use line sets sized to the unit, brazed with nitrogen flowing to prevent scale inside the pipes. Pull a deep vacuum, target 300 microns or better, and confirm the hold. That vacuum test is not busywork, it keeps moisture out of the refrigerant circuit, which prevents acid formation and compressor wear.
Condensate handling is another quiet failure point. In humid climates and in cooling mode, heat pumps pull moisture from the air. That water needs a trap if it shares pressure with the blower, and it needs a clean slope to the drain. Float switches are cheap insurance. I’ve seen finished basements ruined by a clogged condensate line that no one thought to test with a gallon of water during commissioning.
Clearances around the outdoor unit affect both noise and performance. Many of the best units are very quiet at low speeds, but they need breathing room. Two feet on the sides, four feet in front, and no overhanging decks that trap exhaust air are good starting points. In snowy climates, elevate the unit 12 to 18 inches to keep it above drift lines, and plan a path for defrost meltwater so it doesn’t form an ice slab. A small trench or a gravel bed can spare you a winter service call.
Electrical and controls
Heat pumps are electric appliances. Verify that your panel can support the new load, including any auxiliary electric heat strips. A 2 to 3 ton heat pump often draws 15 to 30 amps, while a 10 kW auxiliary heater can add 40 to 50 amps. Sometimes a service upgrade makes sense, especially if you’re eyeing an induction range or EV charger down the road. Work with a licensed electrician, and avoid daisy-chaining outdoor unit circuits from questionable disconnects. Clean runs, labeled breakers, and properly sized conductors reduce nuisance trips and future headaches.
Controls can be as simple as a single thermostat or as complex as an app-driven zoning system. One caution: third-party smart thermostats do not always play nicely with inverter-driven heat pumps. Many manufacturers now provide their own smart controls that unlock staging, weather compensation, and defrost optimizations. If you want to use a popular off-the-shelf thermostat, verify affordable heating system installation compatibility first. A mismatched control can force a sophisticated system to act like a basic on-off unit and throw away efficiency.
Backup heat and balance points
No matter how good the unit, capacity falls when outdoor temperatures drop. The line where the heat pump alone can no longer meet the home’s load is the balance point. Below that line, you either accept a slower warm-up or bring on supplemental heat. Electric resistance strips are the simplest option. Gas or hydronic backup is possible with a dual-fuel setup, where the heat pump handles mild days and a furnace takes over in deep cold.
The art lies in setting lockout points. If strips come on too early, your electric bill will spike. If they never come on, you can run short when an Arctic blast hits. I aim for outdoor lockout points based on the Manual J calculation and local weather data, then fine-tune after a week of lived experience. Some modern systems do this automatically, learning your home’s thermal response and adjusting when to call for backup. But even then, verifying the settings during commissioning is smart.
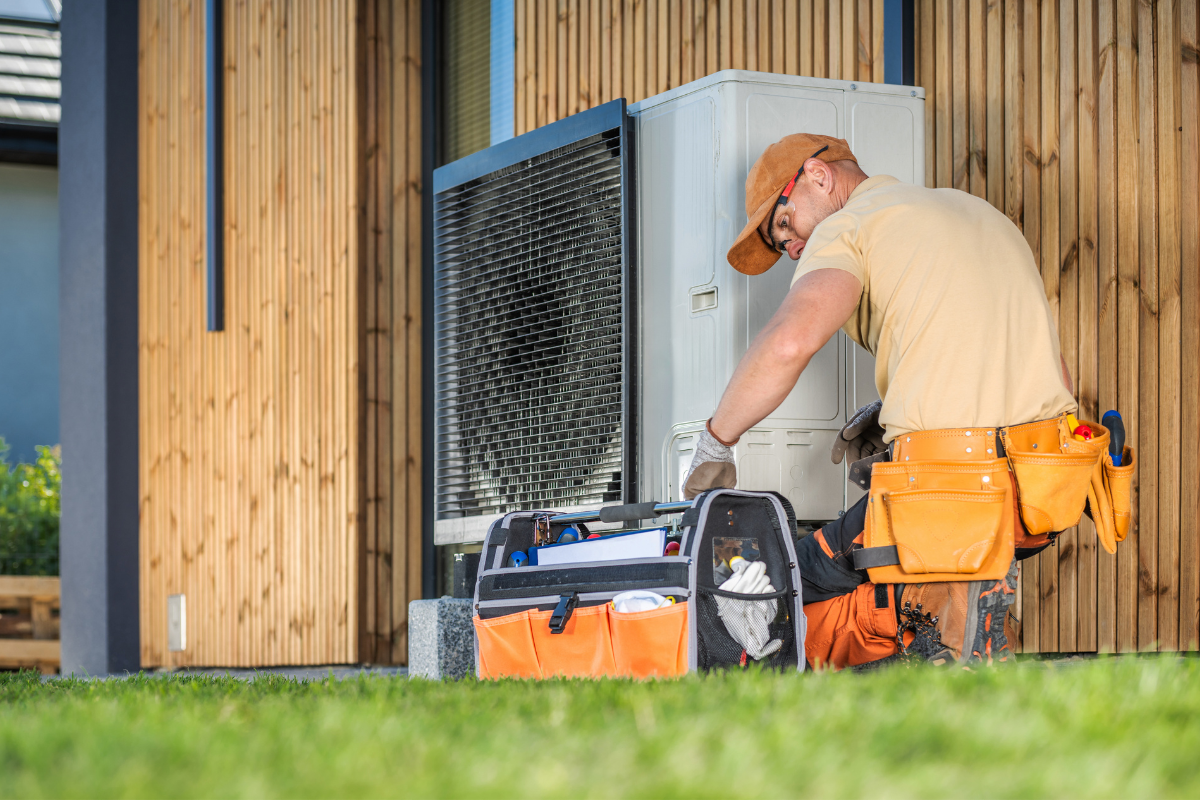
What a good site visit looks like
When you schedule quotes, watch what happens during the first visit. Quality firms ask questions and take measurements. They look in the attic, check return sizes, count supply registers, and measure static pressure with a manometer if the existing blower can be run. They ask about rooms that run hot or cold. They check the outdoor landing spot for clearance, noise considerations, and defrost drainage. They discuss electrical capacity and breaker availability. They might photograph the equipment tags and propose more than one configuration.
On pricing, beware of numbers that arrive within minutes without a load estimate. A heat pump is not a fridge you roll into place. Expect line items for equipment, line set work, electrical, pads or stands, condensate management, permits, and commissioning.
Ductwork: repair or replace?
Ducts are often the least glamorous part of a heating system installation, which is why they are neglected. If returns are undersized, the blower will struggle, your new heat pump will whine at higher speeds, and efficiency will drop. If supply runs leak into attics or crawlspaces, you will pay to condition air no one feels. Flexible duct is fine if it is pulled tight, properly supported, and kept within recommended lengths and bend radii. Metal trunks with short flex takeoffs often strike the best balance.
Sometimes it is worth doing surgery. Enlarging a return or cutting in an additional return in a dead-end hallway can unlock quieter, more even airflow. Sealing accessible ducts with mastic, not tape, reduces losses. If you have a basement, lining the return plenum and adding a filter rack that accepts deep pleated filters can improve air quality and reduce pressure drop. A contractor who treats ductwork like a fixed constraint is going to force the heat pump to work harder than it should.
Commissioning is not a handshake
A proper commissioning visit runs longer than people expect. It includes airflow measurement and adjustment, refrigerant charge verification, electrical checks, and control setup. With inverter systems, many manufacturers require specific commissioning steps to validate warranty coverage. I like to see:
- Static pressure and airflow documented, with blower speeds adjusted to hit target cfm per ton without excessive noise. Refrigerant charge confirmed using manufacturer charts for superheat, subcooling, or target coil temperatures, not just “it feels cold.” Thermostat or controller configured for heat pump logic, outdoor sensor enabled if present, and balance points set for backup heat. Defrost cycle tested, condensate drains verified with a water test, and float switches tripped to confirm they cut power as designed. Photos or a short written report stored with model and serial numbers, wire diagrams, and breaker labels for future service.
Those five steps take time, but they save money later. An hour saved on day one can cost hours on a frigid Sunday in January.
What it costs, what it saves
Budgets vary by region and scope. As a broad range, a single-zone ductless install might run from a few thousand dollars for a small bedroom to more than ten thousand for a high-end, cold-climate unit. A full ducted heating system installation for an average home, including duct repairs and electrical work, commonly lands in the mid to high five figures. Rebates and tax credits can soften the blow. In many areas, incentives fall between $1,000 and $8,000, with higher numbers for income-qualified households or for verified high-efficiency models. Paperwork matters. Make sure your contractor supplies AHRI certificates and proof of commissioning, which many rebate programs require.
As for operating costs, a decent rule of thumb is that a heat pump can deliver two to four units of heat for each unit of electricity used, depending on outdoor temperatures and system design. The actual bill impact depends on your electric rate and what fuel you are replacing. I often run a simple comparison using your last year of energy bills and local weather data to estimate savings. In oil- and propane-heated homes, payback for the equipment difference can arrive within a few winters. In gas-heated homes, savings might be modest, but comfort and cooling tip the scales.
Noise, vibration, and neighbors
Modern outdoor units can be remarkably quiet at low speeds, but placement still matters. Keep the unit off bedrooms when possible or use a line of sight break like a fence panel, leaving room for airflow. Anti-vibration pads under the feet can reduce transmitted noise. Indoors, a well-sized return and a deep media filter keep airflow smooth and reduce whoosh. Short, tight turns in ductwork, especially right at the air handler, cause hiss and hum. If you hear a constant metallic rattle, look for loose sheet metal, not an imaginary compressor fault. A few minutes with a nut driver and foil tape often calms a noisy plenum.
If you live close to neighbors, show them the location before install day. I’ve moved a unit three feet to keep peace on a patio. That kind of courtesy is cheaper before the pad is poured.
What maintenance really looks like
A heat pump does not need fussy attention, but it does need steady basics. Keep filters clean. For most homes, that means replacing a 1-inch filter every 2 to 3 months or upgrading to a 4-inch media filter you change once or twice a year. Rinse outdoor coils gently in spring and fall, and keep vegetation at least a foot away. Once a year, have a technician check electrical connections, take refrigerant pressures or temperature splits, inspect the condensate system, and clean indoor coils if needed. If you see ice buildup on the outdoor unit outside of a brief defrost cycle, or if you hear repeated on-off clicking, call sooner rather than later. Small issues caught early prevent compressor stress.
Common pitfalls and how to avoid them
Skimping on the load calculation leads to oversizing, which leads to short cycling. Chasing the highest nameplate efficiency without considering climate and ductwork can backfire. Multi-head ductless systems sound flexible but often run at higher average speeds that reduce real-world efficiency. Ignoring static pressure is a quiet killer of comfort. Using a generic smart thermostat without verifying heat pump compatibility can disable advanced control logic. Treating commissioning as optional is a mistake that hides for months, then shows up as comfort complaints in the first cold spell.
Make your expectations plain. Ask for the Manual J summary, the duct static readings, and the commissioning checklist. Good contractors are not offended by those questions. They have the documents ready.
A quick homeowner readiness checklist
- Confirm electrical capacity and permit requirements before the install date. Decide on outdoor unit placement with attention to snow, drainage, and neighbor noise. Approve any duct modifications needed to achieve target airflow and static pressure. Verify control strategy, including backup heat lockout points and thermostat compatibility. Get model numbers, AHRI certificate, and commissioning report for warranty and rebates.
What changes in older homes
Older homes bring character and quirks. Plaster walls make refrigerant line routing difficult. Attics might be cramped and hot, with marginal insulation. Returns are often undersized. In these cases, a mix of approaches can work. I’ve used ductless heads for challenging second floors while keeping a ducted first floor. I’ve run slim ducted air handlers in knee walls to serve bedrooms invisibly. Sometimes the best investment is air sealing and insulation before you close on equipment. Lowering the load can let you choose a smaller, quieter, less expensive heat pump and get better comfort to boot.
Historic districts sometimes restrict outdoor unit visibility. A simple fence panel that allows airflow or a lattice screen can satisfy permit reviewers. Whatever you build around the unit, leave service access on one side and keep the top open to the sky.
Weather, grid, and the future
Heat pumps pair well with rooftop solar. If you already have panels or plan to add them, the economics improve. Battery storage can keep a variable-speed heat pump running during outages, especially if you avoid resistance strips. Some utilities now offer demand-response programs that slightly adjust setpoints during peak hours in exchange for bill credits. If you opt in, use the manufacturer’s app or a compatible thermostat so you retain control and can override events when needed.
Cold climate units have advanced quickly. Five years ago, many struggled below 10 degrees Fahrenheit. Today, premium models still deliver 70 to 100 percent of rated capacity at zero degrees. That said, remember your actual house. A flashy spec sheet does not fix a leaky attic hatch or a starved return.
What a smooth installation day feels like
On the day of heating unit installation, crews arrive with a plan. The old equipment is removed with care, refrigerant recovered as required, and the space cleaned. New line sets are routed with tidy runs, properly insulated, and supported. Brazing is done with nitrogen purge. The vacuum pump hums for a while, then gauges show a deep vacuum that holds. The outdoor unit sits level on a pad or stand, secured, with tidy electrical and a clear drain path. Indoors, the air handler sits on vibration pads. The filter rack holds a good media filter that fits without air bypass. The thermostat powers up, the system starts quietly, and you feel steady, gentle airflow. The crew tests and explains lockout settings, shows you how to change filters, and hands over paperwork.
If an installation wraps in a few hours with no measurements taken, something was skipped. A full day for a straightforward single-stage replacement is typical. Two days is common for a ducted inverter system with duct adjustments.
Final judgment calls
Every house has constraints. You might not have room for a perfect return plenum. The panel might not support the size of electric strips you would like. The outdoor unit might need to tuck into a less-than-ideal corner. Good installers manage these trade-offs openly. They explain why they chose a slightly smaller auxiliary heater or why they added a second return in a hallway. They steer you away from oversized equipment to allow quieter operation. They document the choices made.
Heating system installation is equal parts math, craft, and listening. If you focus on load, airflow, and commissioning, and you pick a contractor who treats those as non-negotiable, a heat pump will deliver the comfort and efficiency it promises. The right system, correctly sized and thoughtfully installed, becomes the quiet part of your home you stop thinking about, which is exactly the point.
Mastertech Heating & Cooling Corp
Address: 139-27 Queens Blvd, Jamaica, NY 11435
Phone: (516) 203-7489
Website: https://mastertechserviceny.com/